Heavy Canvas Boot Gaiters
The problem with leather boots is that they can get saturated, even if goretex liners prevent your feet getting wet. The mud coating which washes easily from wellingtons, requires soaking the leather boots again and then waiting for them to dry.
Gaiters are popular in shooting circles amoungst the likes of beaters and pickers up especially, allowing the wearing of leather boots whilst minimising the ingress of mud and water.
I came across a supply of heavy duty ex-military rip-stop canvas, of the type used to make canvas tilts for Land Rovers. Besides some heavy duty bags etc. I wanted to see if I could make some gaiters tailored to my favorite, La Chameau 12" boots.
The fabric is very stiff, something I mitigated a bit by washing in fabric softener and tumble drying. I will spray with water-proofer later which will tend to stiffen them again.
Commercial gaiters are often made of nylon material, which is useless for beating in thorn and bramble. Those made of canvas type material, tend to be made as a zipped tube, with fit achieved by draw strings and elasticated sections.
Since I knew which boots I wanted to fit, I was able to cut a pattern which sat onto the boot, with just a lace hook at the end of the tongue and a fastening under the boot at the arch before the heel block.
The Pattern
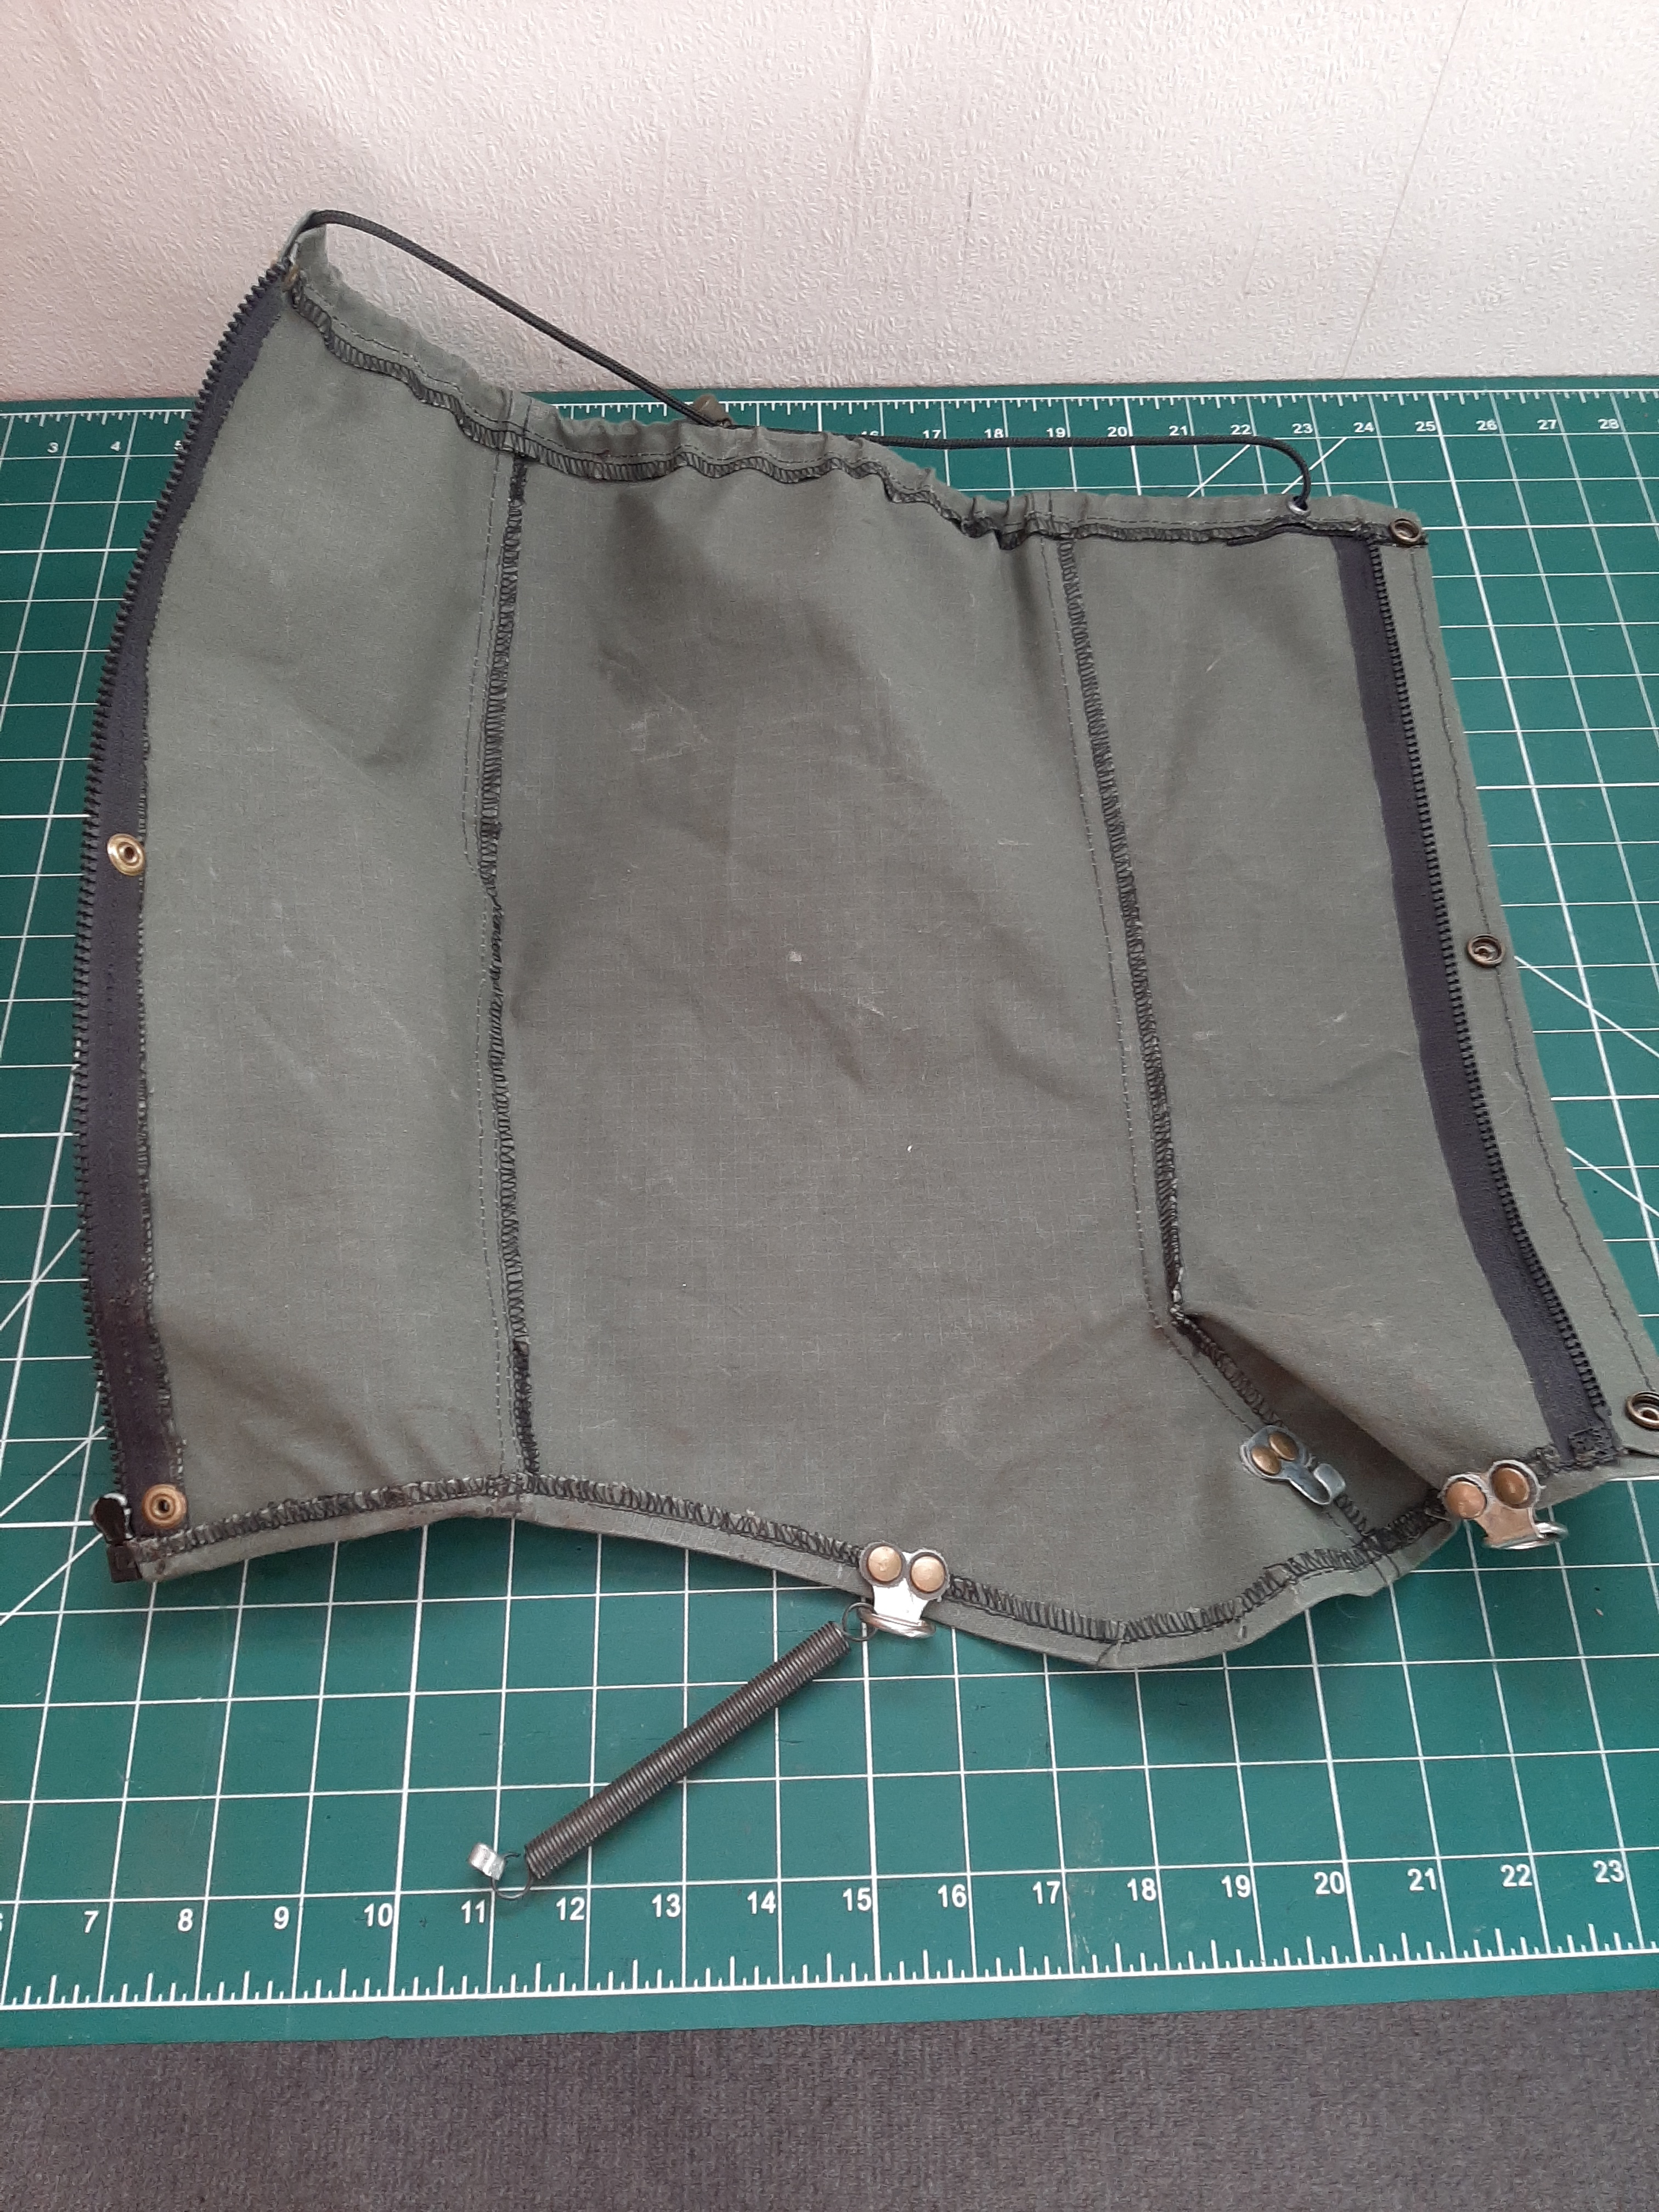
The pattern utilises 3 panel sections, with seams at front and back and an outside side zipper with covering flap and studs.
The largest section covers the inside of the gaiter from front to back plus seam allowances.
Then decide where the zipper line will be, copy the side section onto a new piece of paper, draw the zipper line and then cut along it producing the other 2 sections of the pattern.
These then need additions for seam allowances plus the protective flap on the outside front section that covers the zip.
Construction
I cut out with a scalloped blade and overlocked all edges, albeit my overlocker complained a bit.
Front and back seams are joined, then pressed flat and top stitched down for a stronger seam.
Press all the edge seams and seam allowances but do not stitch down immediately.
First layout your zip, I used a sturdy nylon #5 one, and glue in place with contact adhesive. The top of the zip can be turned under the top drawcord tube and glued in place, so that when that tube is stitched it will fasten the zip in place too.
Stitch the zip in place and then stitch the other seams. I stitched with the top drawcord in place, so as to avoid fiddly threading afterwards, just make sure it is held at the top of the tube with clips whilst you do so.

I used some heavy duty picture framing D ring clips for the under arch attachments, with an expansion spring instead of laces or leather straps, which just get soaking wet.
I made lace hooks from galvanised sheet metal and the under arch attachment hooks from some heavier stainless I had.
All fittings were rivited in position with leather washers to pack out and reinforce.

3 press stud fittings were placed on the side flap, taking care to place where they would not cut through any lines of stitching
The Finished Articles


